


The lead up to Christmas and the traditions that go with it can be just as important as the big day itself. Crafting is always a fun way to get in the spirit, but let’s face it – achievable craft is the best kind of craft!
Paddle Pop Stick Craft
This could be considered the DIY decoration equivalent to ‘Four Ingredient’ recipes. All you need is the following:
- Paddle pop sticks
- Paint
- Craft Glue
- Pom Poms, sequins or buttons
Easy right? And then you can literally make any of the following adorable Christmas decorations and obviously many, many more… They’re actually so easy that instructions aren’t required! Anyway, which kid follows instructions?
 |
 |
So it’s a bit messy (what isn’t with kids)… just make sure to choose paints that are ‘washable’ and perhaps do your craft outside. Most importantly, as Queen Elsa would say, Let it goooooo.
If you’re the type that enjoys a creative challenge (good for you girlfriend!) perhaps give the angel (above) a go – so cute!
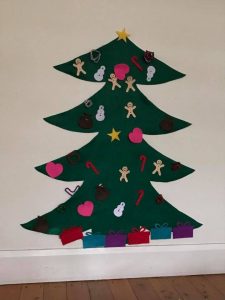
Felt Christmas Tree
by Juliet Rogers
I can’t take the credit for this one. A post was started about these by RDM members last year – it was amazing to see the talent of our RDM members! More of that at the end.
Materials
- Felt:
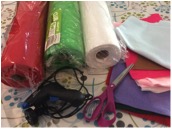
- Green – large piece. Mine was from a 45cm wide roll from Spotlight and approximately 60cm tall
- White – to make the snow at the base so at least as wide as the tree and around 10cm tall
- Other colours as you wish. These can easily be bought in A4 size
- Scissors
- Glue gun (or double-sided tape would work)
- Ribbons, colourful tape, bows, tinsel or anything else you might have
Instructions
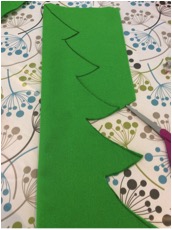
Tree and snow
Fold the large green piece of felt in half, lengthways. Mark up the outline of your tree – don’t worry if you make a mistake or don’t like your outline, just go over it again as this side will be the back of the tree. Cut it out.
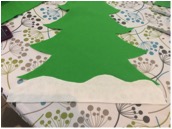
Unfold the tree and lay flat on the table. With the white piece of felt, cut a wobbly line to make the top of the snow.
Glue the snow on to the very bottom of the tree.
 |
 |
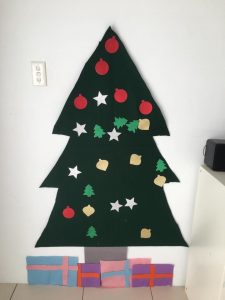
Presents
Cut out, by eye, square and rectangular pieces of felt using 4 different colours.
To make them look more like presents add colourful tape to look like ribbons. You could use other pieces of felt, glitter pens, ribbons or coloured pens to create a wrapping paper effect.
Decorations
Draw around the outside of a small sticky tape roll for the baubles, again using the 4 different colours. The smaller round baubles were drawn using the inside of the roll.
By eye, draw a teardrop outline to create a template on a thicker piece of felt. Use this to draw outlines onto the various felts.
Add tape, glitter, ribbons, pens etc to finish off the decorations.
For the star, use golden felt and stick it to the tree itself.
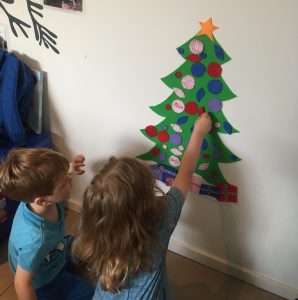
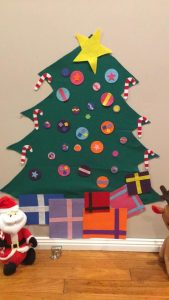
How to play
Stick the tree and snow up on a wall, window, door, easel or wherever that works for you, at a height your child can get to easily. Then let them decorate to their heart’s content knowing they’re not going to smash a precious glass bauble on the floor or hurt themselves!
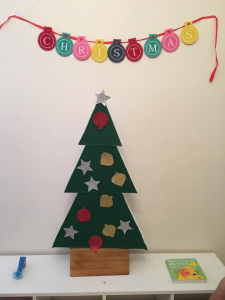
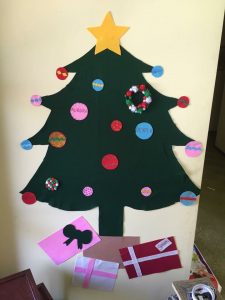
Here are a few of our RDM trees in action too!
Thanks to Jenna Edwards, Janet Glanville, Danielle Jean-Louis, Sarita Beau, Briana Shorten and Anastasia Beverhausen for letting us use your photographs – what a talented bunch of RDMs we have!
 |
 |
 |
 |
 |
 |
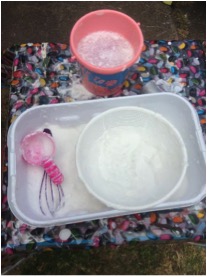
Soapy Snow
by Meredith Gordon
Materials
- Lux pure soap flakes (surprisingly I found mine just at Woolworths)
- a medium shallow container (for a group of kids, I’d suggest an under bed storage container)
- whisk
- water
- glitter paint or fine glitter
Method
Pour about 1 cup of Lux flakes into the container and slowly add water mixing with the whisk (if you’ve got an old-style egg beater or even a few whisks, the kids will love helping out too!) until it thickens and becomes foamy. Add your glitter and swirl it in!
How to play
Enjoy the soapy goopiness of the Soapy Snow. We had an old ricotta basket to explore making splatter patterns in the soapy snow.
(Note: it’s a good idea to have a clean bucket of warm water and a towel nearby to wash hands and unless you’re willing to hover nearby, maybe leave this one for the older toddlers and up).
Variations
Add snowy creature toys, snowflake foam pieces, beads, plastic jewels and peppermint essence for a fun sensory playtime.
Pipe Cleaner Candy Canes
by Juliet Rogers
Materials
- Pipe cleaners – red, green, white and glittery are perfect
- Scissors

Instructions
Cut two different pipe cleaners in half then evenly twist them around each other. Curve over the top to create the ‘hook’ of the cane. My six year old made these really easily and they are so effective! Perfect as a tree decoration!
Variations
Add a third pipe cleaner to add to the colour scheme.


Leave a Reply